

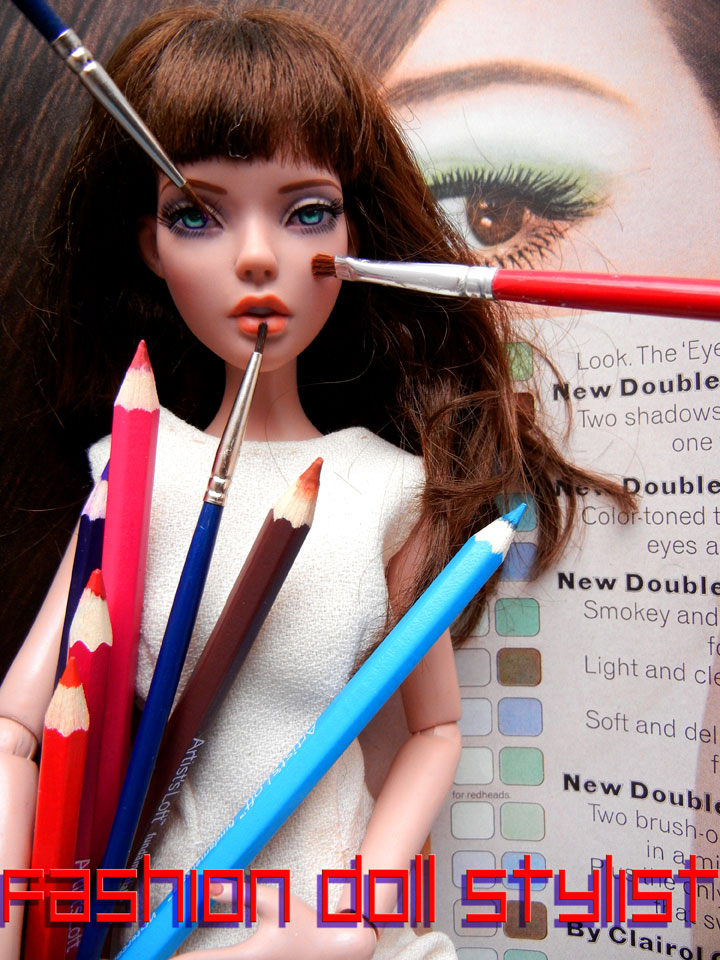
Last summer I held a "Spa Day" for my girls which was enormously popular. This year, we decided to do a part two with our own...salon de beaute. Truth is, I've been very curious about the art of repainting dolls especially when I discovered how some artists use watercolor pencils and chalk pastels to make up the faces!!! As a former fashion illustrator, I am very familiar with this media, I just never thought of using them on my dolls. Oh what fun! But don't get me wrong. I'll never be the next Noel Cruz. All I want to do is to change up my dolls' makeup from time to time and maybe create a few looks that better correspond to those models on today's fashion catwalks.
Take It Off, Baby
 |
| Ingrid |
By the way, I did paint that blank doll face from scratch. The features are already sculpted in, however, I found the difficulty lies in working tiny features of the eyes. My brushes were small enough but the slightest wrong move had me....starting all over again! Nevertheless, I did create "Ingrid," a Swedish model with a fresh scrubbed, "unmakeup" look. I just bought another Black doll head and plan to design another "fresh face." From this experience, I learned that on a regular doll face where all the features are present, it is a good idea to leave the original eyes and eyebrow in tact. For the novice they are very hard to do well! Once word got out around the house about our makeovers, many of my girls (especially the older Barbies and the few My Scene dolls in the house) had lined up outside of my bedroom thrilled about getting a makeover. (There are still taps on my door and droves of dolls volunteering for this post!)
Tools of the Trade

2. 12/0 Fine liner "detail) brush. I use this to paint on "eye liner" or put the sparkle in the eyes.
3,4,5 These too are fine brushes I bought in a pack at my crafts store. They are 3/0, 5/0 and 10/0 brushes I used for applying "eye shadow" either wet (moistened colored pencils #11) or dry, using pastels #10). This is really a personal choice. The temptation is to use the smallest brushes on the market. But smaller isn't necessarily easy! So you want to play with this. What is important is that the brushes you buy should always be able to hold a point. Natural hair brushes will always do this better than synthetic.
6. An old makeup brush for blending the "blush" or brushing over the face.
7. Cotton balls
8. Cotton swabs for removing lip color
9. Toothpicks for removing color out of the crevices OR....for making super thin swabs to use when removing existing eye color OR as tiny brushes for applying "eyeshadow" (#10)
10. Chalk pastels. "Blush," "highlighter," or eyeshadow. A good art supply store will sell these separately or you can buy a small box of quality pastels.
 11. An assortment of watercolor pencils for lipcolor, nail color, eyeshadow. For how I use them, the inexpensive work about the same as the more expensive.
12. Acrylic paint. Good for "permanent" lip color and changes to the eyes. This tends to be thick. So you'll want to use this sparingly.
13. Small container of water. And don't forget the paper towels to mop up spills or blot your brushes.
14. If you decide to remove the existing paint from your dolls' faces, nail polish remover with 100% acetone is best. HOWEVER...don't get too crazy. I've read reports warning aggressive application can dissolve the vinyl...particularly the kind used for Barbies. So use as little as possible when removing old paint.
15. This is topcoat (for nails) I use as "gloss" to give a shiny look to the lips. I use the brush that comes with it, but also a toothpick for getting it onto the edges of the lips. I've also used colored nail polish for lipstick as well.

Take a bit of cotton and place it over the end of a toothpick. Twist the toothpick to wind the cotton onto the end. This makes for a very tiny point, ideal for getting rid of makeup in small areas without disturbing the rest.
I didn't like the sparkle highlighter under Barbara's eyebrows. My handmade swab dipped in acetone was perfect for cleaning up this area.
I did have a bit of a problem removing the sparkles, so I used the bare end of the toothpick to help scrape off the specks, followed by the cotton tip. I kelp working until all the glitter was removed.

For the most part, I'm pretty happy with the way my Fashion Royalty dolls are made up. But every now and again, I question the designer's choice of eye shadow. This is Morgan on the left. I love her face except for the heavy handed purple eye shadow. Again, by using a toothpick wound with a tiny bit of cotton and with acetone, I was able to remove only the area I wanted without disturbing the rest.
The Eyes Have It


 She's Blushing!
Blush, highlighter, bronzer are all applied the same way.
Scrape a bit of pastel from the stick onto a piece of paper, dab the chisel tip brush into the "powder" and apply.
Biggest tip here is to apply by dapping the color onto the cheeks as opposed to scrubbing or wiping.
What's fun here, is that you can mix colors or sculpt the cheekbones using pinks, browns and ivory pastels. (Oh this is way too much fun!)
But what we are not doing here is "sealing" our work which makes it permanent. So when you've finished, just be careful not to smudge dolly's makeup!
But what we are not doing here is "sealing" our work which makes it permanent. So when you've finished, just be careful not to smudge dolly's makeup!
Lip Service
 |
| Same doll, two different makeup looks. |
There are a couple of ways to go here. For some dolls, I decided to do away with the existing color and start afresh. On the other hand, I have many dolls with lip color I'm pretty happy with. For those dolls, I applied the color over the existing lipstick. Because I want to keep the doll's existing lipcolor, I didn't apply the topcoat. You will end up with the look of matte lipstick.
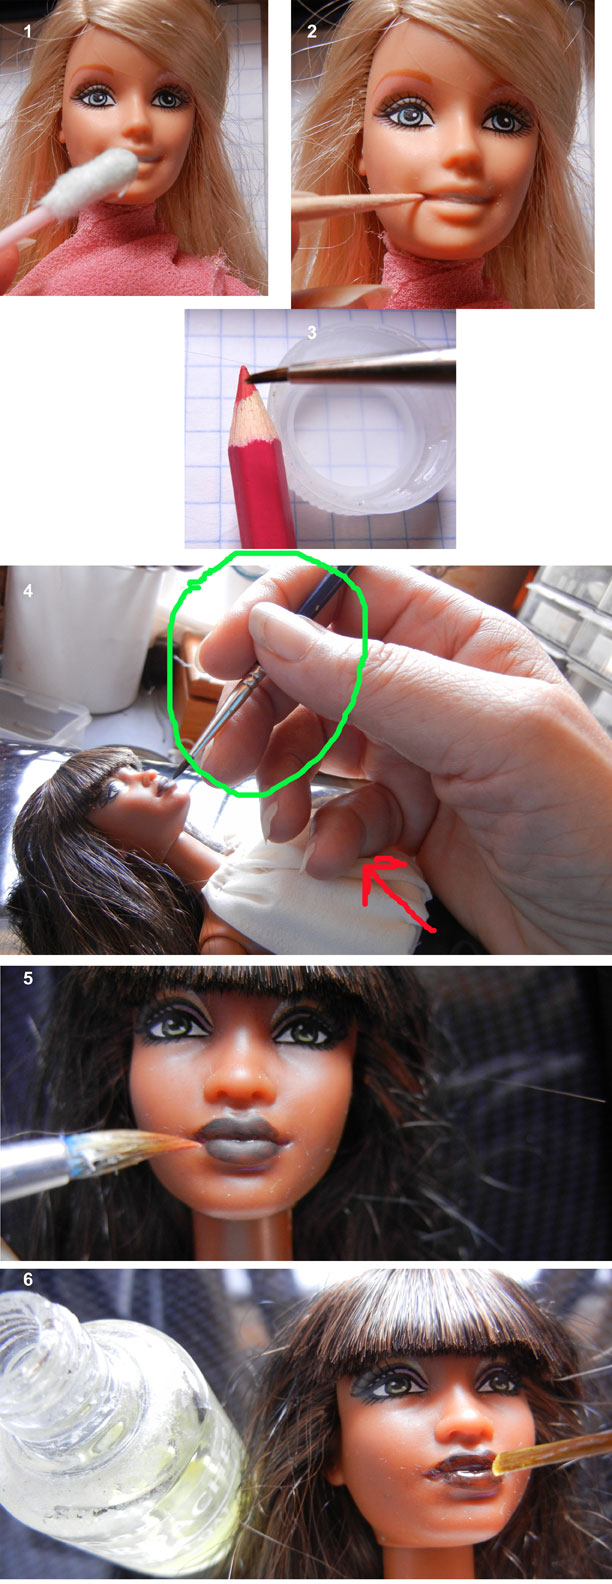
1. When removing the original paint, dip the cotton swab in acetone and quickly wipe.
2. Use the tip of a toothpick dipped in acetone to remove paint from the corners of the mouth.
3. You could use nail polish, however keep in mind, it is thicker and more opaque. If you want something lighter or don't feel like buying lots of different bottles of lacquer, use watercolor pencils. Again, begin by wetting the brush then rubbing against the pencil to coat the bristles.
4. Steady your hand as you paint. Put your hand on the doll, resting the side and baby finger against the doll (red arrow). You will move the brush with the thumb and two fingers (green circle). This keeps the hand steady as you paint.
5. You want to make sure you have enough paint on the brush and that, while applying, you paint using as few strokes as possible. Should certain areas not cover well, dab the paint on carefully.

This notion of "temporary" makeup as so many possibilities! Pictured below....fun with FIMO brand metallic powder. Inspiration was taken from real live model, Wang Xiao (left) for Style magazine and interpreted for my dolls Liu (center) and Helena (right).


Nailed It!

If you've ever tried to paint doll fingernails, you know how frustrating it can be to control the paint. With the watercolor pencil, it got much simpler and plus, you've got a big array of color choices!
1. Dip the point of the pencil directly into the water.
2. Apply directly on the nail portion of the fingers.
3. You can use a wet brush to smooth out the finish if necessary. Allow to dry
4. Apply a dab of top coat with the help of a toothpick.
Getting Inked


I chose these metallic designs which come on a sheet. You simply choose the design you want, cut it out and wet the backing.
Hold the design face down against the doll for about 20 seconds.
Though I don't expect Radiah will want to, when the time comes to remove it, a quick swipe of acetone removes everything completely.
Hair Raising Tales
For awhile now, I've been scouring the internet searching for bloggers who specialize in cutting and styling Barbie doll hair. One of the best, in my opinion, is a young man who goes by the name "EahBoy" (Every After High Boy). I've included a link to his YouTube videos at the end of this post. Though he works primarily with Monster High dolls, his tutorials--each one of which run for 2 minutes or less--can easily be applied to other dolls. Guided by one of EahBoy, I trim Ingrid's waist length locks. Eventually I would like to cut her hair a bit shorter, but the tutorial wisely suggests cutting a little at a time until you are happy with the length.

2. Using a rattail comb, begin by sectioning off the hair at the back of the head. Clip or pin the rest together on the top of the head.
3. Comb the hair down and clip to the desired length.

5. Continue layer by layer until the entire head of hair has clipped. Brush the hair and clip any stray hair.
6. Brush the hair in the front and trim according to the desired look. Allow the hair to air dry.
Here's another makeover using a different doll with thicker hair.

2. Using the instructions above, I've trimmed her hair to the desired length.

"No cut" Hairstyle
Here's another proposal from EahBoy. The idea is to give your doll a shorter hairstyle without scissors. That's perfect because dolls hair does not grow back when you cut it. So instead of clipping Jourdan's long, lovely locks, I decided to give her a trompe l'oeil dramatic 'do.

2. Tie into a pony tail high on the head. I prefer to use twist ties instead of rubber bands. It's easy to remove it later and doesn't get tangled in her hair.
3. Take out a small lock of hair and wrap around the twist tie at the base of the pony tail.
4. Brush all around the head.

Easy Curlz


2. Roll up to the scalp then tie.
3. Continue along the neckline, then proceed to the next layer.
4. Continue until all the hair has been rolled.

6. Remove from the hot water and immediately dunk into the cold water.
7. Towel dry.
8. Allow the hair to air dry. Inasmuch as it's summer, I sat Apple outside in the sun to speed up the process.

10. Instead of using a comb, I used my fingers to loosen up the curls.
11. The result is just as I remember my own hair when mom removed the paper twists. Apple's hair is soft and shiny. Her curls are soft and lovely.
Barber Shop


Here's my guy in his original state.
1. I decided to make my own flocking. I had some hair left over from a wig making project. I cut it into very tiny pieces onto a sheet of waxed paper.
2. I slathered on a layer of ModPodge all over the doll's head.
3. Next, I sprinkled, then patted on the flocking. You can allow this to dry and add another layer of glue and flocking.
 When it's all done, here is what my guy looks like. It's not the "clean cut guy" with the Weatherman style haircut, but instead, a beach boy with wind blown hair!
 On a doll with a short cut, like Larry here, the everything looks very natural!
And while we're at it.... The problem with Ken dolls is that they are all clean shaven. I don't really like bushy beards on dolls, so I created something more natural looking. I used a dark brown watercolor pencil and wet brush to add a bit of stubble to Larry's face. This is quite easy. You simply dab the brush to make a series of specks above the lip line and on the chin! I also filled in his eyebrow line for a thicker brow.
Dolly Hair Stylists:
 |
| Photo: damnfunnypics.com |
There are plenty tutorials on styling dolly hair if you know where to look.
Every After High Boy has numerous tutorials including:
How to Cut a Short Bob
How to Curl Short Hair
How to Cut Layers
"MakingKidsToys" has explored nearly every the A-list pop star and trendy urban hairdo on the planet. She has replicated the signature hairstyles of Ariana Grande, Rihanna and Taylor Swift, just to name a few for Barbie. Especially good site for those of you in search of "younger" edgy, dolly 'dos.
On her, A Day in the Life of My Dolls, Phyllis provided link for flocking: Chrystal Desilva's tutorial can be found by clicking HERE
Long before Mattel came out with cornrows Ken, our friend Muff of Hey, It's Muff, did her own tutorial on this hairstyle with a post entitled, "Flock Yo Cornrows. You can find it by clicking HERE
On your mark. Get ready. Makeovers for everybody!!!!

Except where indicated, all photo and text property of Fashion Doll Stylist, 2017. Please do not use without prior permission. Thank you.
Follow us on Twitter: @FashDollStylist
Like us on Facebook: @FashDollStylist
We're also on Pinterest: @FashDollStylist
Come join us on Instagram and show off your stuff: instagram.com/fashiondollstylist
.
De: Fashion Doll Stylist - http://fashiondollstylist.blogspot.com/2017/08/beauty-parlor.html
Fecha: August 05, 2017 at 06:25PM
.
Haz clic en la foto de abajo para ver otro de mis Blogs.
Encontraras mas publicaciones interesantes.


0 comentarios:
Publicar un comentario