
I had been struggling with the pattern and what fabric to use for my Monica's inner bodice and collar. This is the inspiration I'm basing her costume on....
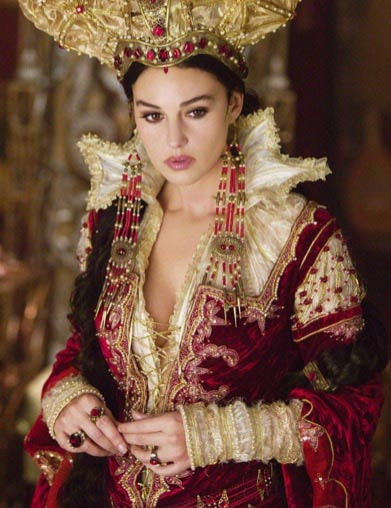
It's clear that her inner bodice is gathered at the neck, but I couldn't figure out how to do that on such a small scale. The choice of fabrics was also eluding me. I wanted something in cream, that was a bit 'sheer', and possibly with a bit of a pattern in it, so ended up with these three....
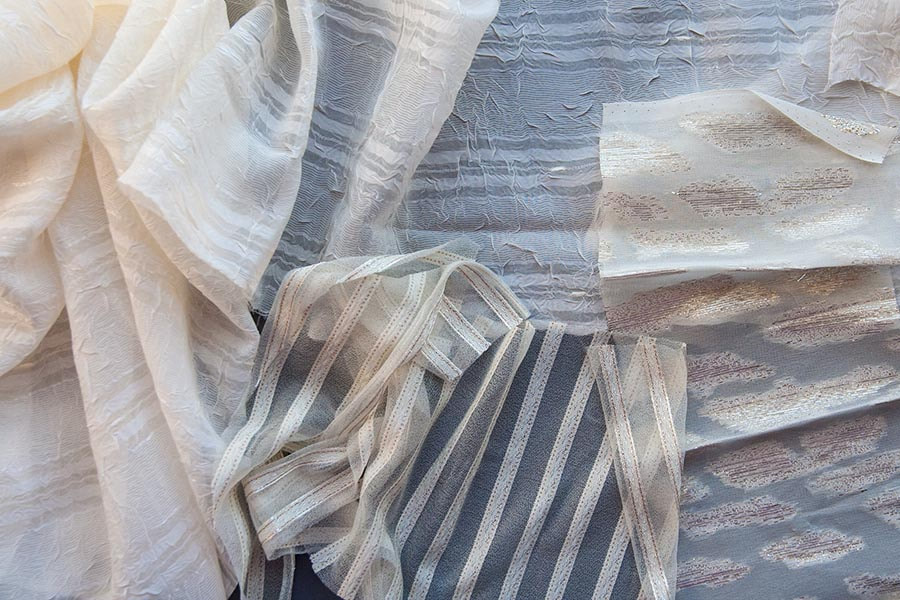
There wasn't enough of the one on the far right, and I couldn't get the striped one to work with the stripes going in the right direction all flaring out from the neck, so ended up choosing the crinkly cream curtain sheers. I ironed as much of the crinkle out of it as I could, then traced my patterns onto it and cut it out, leaving the lining pinned to the 'right' side, since it was impossible to tell which was the right side, and I didn't want to get confused later trying to match the linings to the right sides later.
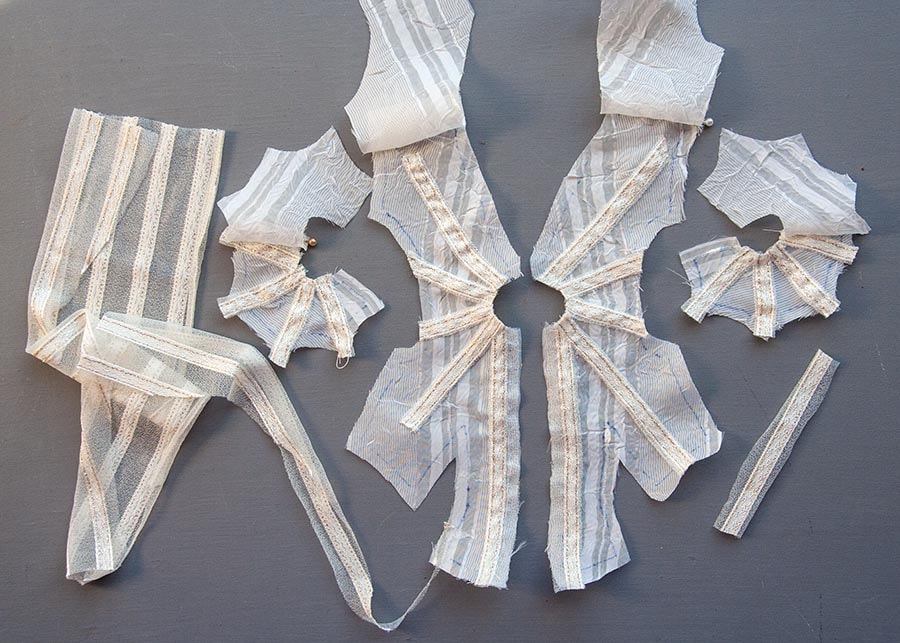
Then it occurred to me that I could cut up the cream and gold striped fabric, and baste it onto the actual collar and bodice fabric to simulate the gathers of the original. So I spent three hours last night hand-basting the strips onto the collar and bodice sections, then a whole five minutes this morning machine sewing over the basting. It might seem like a big waste of time to some, doing all that basting, but with something this small and flimsy it's important to go slowly, one small step at a time. And I'm a perfectionist....
Then it occurred to me that I could cut up the cream and gold striped fabric, and baste it onto the actual collar and bodice fabric to simulate the gathers of the original. So I spent three hours last night hand-basting the strips onto the collar and bodice sections, then a whole five minutes this morning machine sewing over the basting. It might seem like a big waste of time to some, doing all that basting, but with something this small and flimsy it's important to go slowly, one small step at a time. And I'm a perfectionist....
I couldn't press anything yet at this point, since I'd traced my patterns with a pen whose ink disappears with heat. I find it so much easier, and so much more accurate to trace my pattern templates onto the wrong sides of fabric and then sew on that line, but with light coloured fabrics one can't use a regular pen or pencil. I use a Pilot FRIXION. The first one was a gift from a friend. It's perfect for tracing templates onto light coloured fabrics, because it will disappear when you iron it after sewing. When that pen ran out, I found more in the Walmart stationary department....
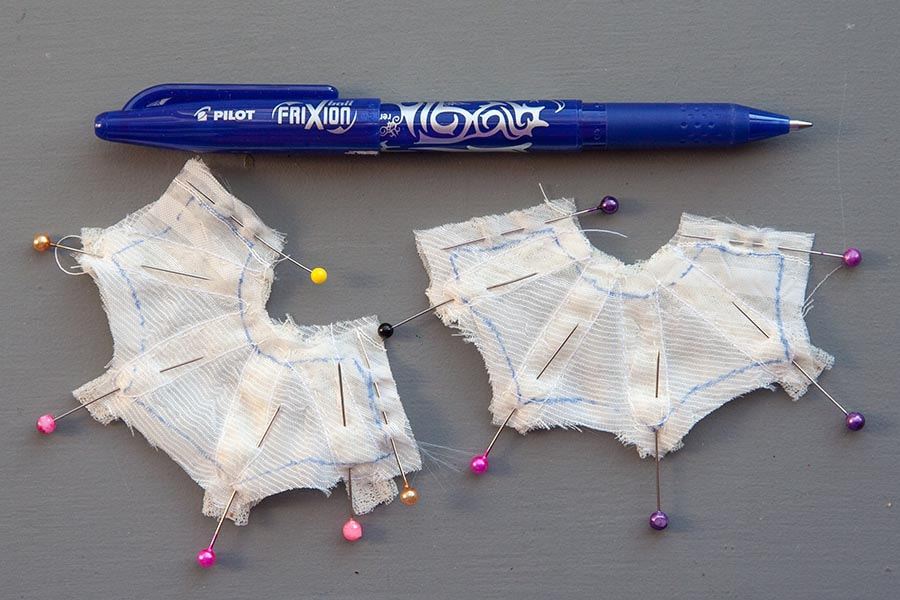
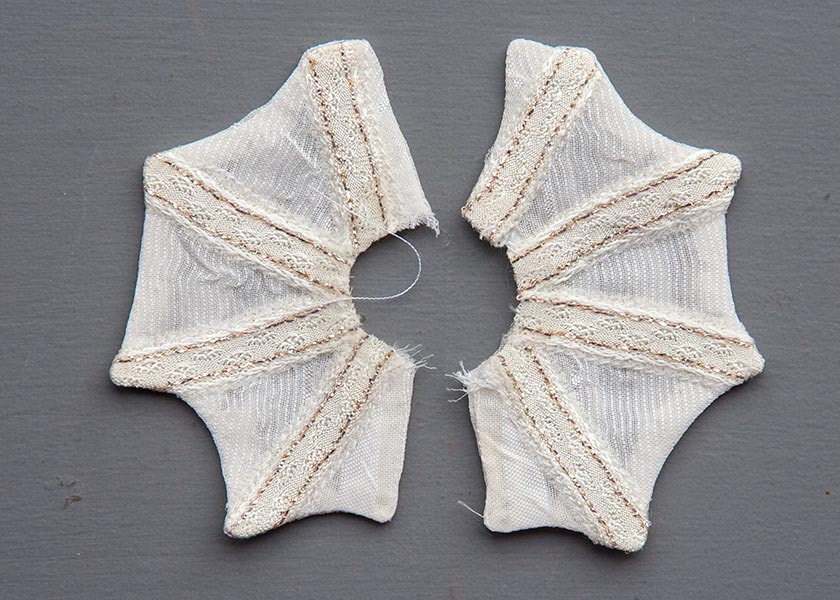
So I pinned the right sides of the collar together, and very carefully machine stitched it together with a small stitch. Then after clipping the corners, turned them right side out, and pressed them.
They might not look very 'pointy', but remember the collar is barely an inch wide, so is much smaller than the photo suggests. They will look much better after I bead the edges, but first I have to attach a neck band to the collar, then sew that into the bodice, and that's always one of my least favourite things to do, especially with something so small and flimsy. And there's TWO of them!
They might not look very 'pointy', but remember the collar is barely an inch wide, so is much smaller than the photo suggests. They will look much better after I bead the edges, but first I have to attach a neck band to the collar, then sew that into the bodice, and that's always one of my least favourite things to do, especially with something so small and flimsy. And there's TWO of them!
.
De: Antique Lilac - Blog - http://www.antiquelilac.com/blog/making-a-collar
Fecha: December 12, 2019 at 12:42PM
.
Haz clic en la imagen de abajo para ver otro de mis Blogs.
Encontraras mas publicaciones interesantes.


0 comentarios:
Publicar un comentario