I take suggestions for projects seriously, so when Kamelia left a comment saying "maybe you'll make a beaded dress some day," I decided to delve into the subject matter especially in light of all the beaded dresses we saw during Haute Couture week.
Disclaimer: I am NOT an expert in this field. Years ago I did a weekend workshop held by
Elisabeth Roulleau, who studied at the world famous school of
Lesage. She is a professional, skilled in Luneville embroidery (otherwise known as Tambour embroidery). I should have taken a basic course in English embroidery first. Beading was very challenging and I was a slow learner. Luneville or Tambour embroidery entails using a minuscule crochet hook and a frame over which fabric is held taunt. The "hook" is pushed up through the underside of the fabric catching a line of stranded beads you hold with your other hand on top. Essentially it is a form of crocheting the beads or sequins to the fabric--a method used by the world famous embroiderer, "Lesage." When completed, the back of the fabric is as beautiful as the exterior. That is NOT what I'm doing here today. Instead, I am taking on a
somewhat easier method--needle embroidery. Though it is easier, it is still challenging and time intensive. But like anything else---it takes practice.
A while ago, I did a post on "
faux embroidery" and another on clever ways to
use beaded fabric where I carefully cut out lace medallions and stitched them onto an existing dress as a way of creating the illusion of luxury embellishment. I still hold fast to that idea because it is a quick and easy way of getting the look--especially for beginners just getting used to needle and thread. Beaded embroidery of any variety is an art. And like other forms of art, mastering it requires.....TIME and PATIENCE!!! Two things I'm usually short of! This project took me FOREVER! It takes a lot of thought and planning! And should you miscalculate--let's say the beading on a sleeve is too thick, for example.....well, you've just lost another day! I made many mistakes. It took me awhile to control the stitches. There are many imperfections here. But the good news.....beads are beautiful The mistakes are also beautiful!
SUPPLIES
It's not about needle and thread and handful of plastic beads. What you put into this project is what you reap! Everything must be to scale which makes this all the more challenging.
1. There are different types and sizes of beads. Pictured here are "tubes," the long narrow beads usually sold on strands.
2. Seed beads are sold in packets, small tubes or containers. They come in different sizes. The larger the number the smaller the bead. These silver beads are size 11 which I have found to be the largest bead you will want for doll clothes. And even then--you will want to go lighthanded because this is large for a 1/6 scale dress.
3. Beads also come in strands like these (size 11/0) red beads. You will want to buy decent looking glass beads for the best results.
4. These black beads are size 13/0 which, I feel is a perfect scale for the doll. My craft store had beads as tiny as 15/0. I did not buy those because you will need to also find needles and thread fine enough to thread them!
5. Thread is another important factor. As you will notice next to it, beading needles are not only fine, they have very tiny eyes. Most thread is way to thick. Experts recommend nylon or silk thread. Pictured here is a spool of silk thread which threads into my needle without any problem. But silk thread comes at a cost! Though it's not on the recommended list, I discovered that "invisible" or "transparent" thread is also a good choice. It's hard to see and even harder to knot, but it threads like a dream and solves the other issue which is---the thread should perfectly match the bead!
6. You'll need to go to a crafts store to find beading needles. The needle to the left is a #9 embroidery needle which is a little easier to find. Though it looks quite thin, you will soon discover those tiny 13/0 beads won't pass over the eye! Still, for the larger beads (#11/0) it works. What doesn't work--sharps!!
7. The embroidery needles are super thin and bend easily. Forget about using a needle threader. You need magnifying glasses, also recommended while beading. The beading needle here is size #12 (the thinnest my craft store carries) which I used for the 13/0 beads used to create the black beaded flon the black lace top below.
8. Again. Thread is important. Pictured here is "transparent" thread. I used both the silk and this one. Silk thread has more tooth, but transparent thread is way less expensive. This is where I felt I could honestly cut back a little.
Do you really need an embroidery hoop? It depends. They are ideal in that they keep the fabric taunt which makes it easy to control the execution and tension of your stitches. When I used a heavy lace as the base, I was able to add the beads without problem. On the other hand, if the fabric or lace is fine, you really need a hoop to keep the stitches from "shrinking the fabric" as you embroider.
Let's Get Started
This is how you always begin.
1. Use a double thread for strength, knotted at the end.
2. On the underside push the needle through to the right side.
3. Very close that point, push the needle back down to the under side.
4. Bring back up to the front and knot.
A Stitch in Time
So that you can see these techniques best, I'm using much larger beads, needle and thread than are normally employed.
The Beaded Backstitch
What is interesting about this stitch is that I learned you don't have to sew beads on one by one. You sew them down in clusters, only tacking down a few at a time. With this stitch, you decide where the end point is going to be and then you go back and tack the last two or three beads. Don't sew from side to side, but rather, up and down though the fabric (like a sewing machine), trying to keep the needle as straight as possible.
1. Start out by knotting and securing the thread as we just showed you. Then bring the needle up to the right side of the fabric. Load on your beads (3-6 at a time is ideal). Lay the line of beads down and insert the point of the needle at the end of the line and push through to the back.
2. When you pull the thread through, it looks like this.
3. Bring the needle straight back up with the point coming in between the last two beads of the line.
4. Slide the needle through those two beads.
5. Reload by adding more beads and repeat the process until you have arrived at the length and look you are going for. Push the needle straight down after the last bead and knot on the underside.
This is a great basic stitch for almost everything!
The Loop
This starts out the same as the previous technique but the endpoint is the same as the start point of the beads.
1. Start out the same as you did before with the thread knotted and secured. Load enough beads on to form a circle.
2. Insert the point of the needle at your original start point (at the base of the first bead).
3. And push the needle straight down. A loop is formed.
4. Bring your needle back up with the point positioned in between the third and forth bead. Tack the thread down with a tiny stitch. Repeat. Position the needle point between the sixth and seventh bead, etc.
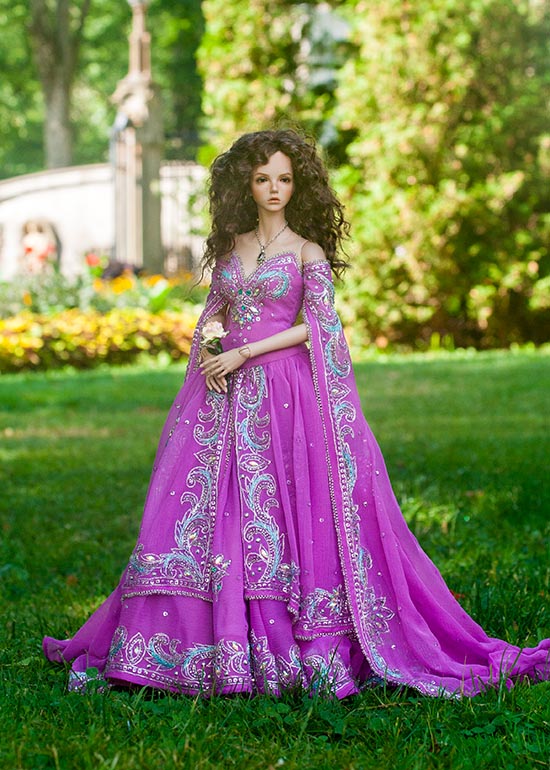
This is a great stitch for making simple designs with a bead in the middle like the lace tent dress below.
1. I sewed on a pearl in the middle of the lace flower.
2. After securing the thread with a knot, I loaded my needle with enough small beads to encircle the pear.
3. You can secure the loop by either tacking down the thread in between every two beads using the backstitch method.
4. Or you can tack down the thread in between every two stitches with tiny whip
stitches.
The end result is subtle, quite pretty and achievable for even the least experienced seamstress!
Fringe
Nowt his is really a lot of fun. Each strand you create can be as long as you want. But a note here: the longer the strand, the more adjusting you will do to work out the lag in the thread.
1. Start off the way you did when you were doing the backstitch. Bring your knotted thread to the right side and load up your needle. You can add whatever number of beads you want for the dimension of fringe you wish to create.
2. This time you will not be stitching the end down. Instead, leave the last bead free and push your needle through the remaining beads and back out of the first one.
3. Pull the thread up so there is no slack and the base of the beads are lined up next to the origin of the stitch.
4. Push the needle through to the back and secure. You now have a free swinging fringe.
Crouching
When you stitched down the thread in between beads--that's called "crouching." Using this method, you are basically sewing strands of beads in place. Another interesting (and basic) method of applying beads to a pattern or design. Seed beads often come in strands which most likely won't be the exact length as needed. So you will need to get the beads off the strands without scattering them everywhere.
1. Carefully remove a strand from the shank of beads. Find both ends and simply pull them away from the rest. Hold on tightly.
2. Tie a knot around one end of a single bead. This will stop the others from sliding away. Keep the other end open.
3. Take your threaded (and knotted) needle and slide it in the middle of the threaded beads. Push the beads onto the needle with your finger and then down onto your thread until you have your desired length.
4. Slide the thread of the strand away. Knot your new strand when you have arrived at the desired length.
1. Position your beads on top of your pattern. I used a regular sized pin to hold in place. But this may get adjusted as I work to conform to my pattern.
2. Separate the beads every 3 or so beads and make a tiny whip stitch around the thread to hold in place.
3. This is my result.
4. Here are the four techniques I used today.
I had a little fun with Christmas ribbon to create my "Oscar" dress. The lines on the dress are made using the back stitch method with beads that match the gold edges of the ribbon. There is a touch of fringe on one side of the dress. Going down the center of the sleeve are both the back stitch and the loops. The collar came about as the result of a fail. I had originally beaded piece to be used on a sleeve. This took me the better part of a day to embroidery the lines of beads you see here. But the beading was so heavy and thick, the doll appeared as though she were wearing a beaded plaster cast! Not wanting to lose a day's work. I turned this piece on its side, wrapped it around the doll's neck and fasten it together with hook and eyes!
Take a Tip
1. Start small. The tiny embroidery in the middle of the lace medallions on that white tent dress is a perfect start. It's a way of getting a small taste of this art at minimal expense and time.
2. Designing patterns for embroidery is extremely difficult. Often, what it looks like on paper can be very different when spelled out in beads. I recommend using lace as your base then tracing around existing patterns with beads.
It's called "re-embroidered lace." For this project, I decided to make my own beaded appliques. I cut up an old blouse and took out needle and crystal beads.
1. Knotted needled is pushed up through the lace and loaded with beads.
2-3. Using the loop method, I was about to trace the contours of the flower.
4-5. I stitched down the beads using the crouching method.
6. After completing each motif, I knot the thread on the wrong side.
I repeated the technique, using silver beads for the middle of the flower. Here's the floral medallion before and after! I made several of these which could be used to transform existing dresses into little works of couture.


Or think about using touches of embroidery on sleeves pant legs
But them you know me.....I had to have a full dress. A lot of thought went into what I thought it should look like!
I began with a strapless sheath made from beige lace. I was quite generous with the beads so when I put each medallion on the doll, I discovered how chunky each one was. The dress did not have a good balance with the medallions were place on top. So I chose to scatter them below the waist towards the hem. I added beads to the dress itself, tracing around the hem and around a few of the smaller motifs near the bust. I added beaded strap and a little bit of fringe to give the dress a 1920's swag.
I learned an important lesson here. The bigger the bead, the fewer you should use. Otherwise things have a way of getting very heavy which is not flattering at all. You can use heavier doses of the tiny beads 13/0-,14/0 or 15/0. But be prepared to spend more time with smaller, thinner needles!
I will probably revisit this subject again in the future, but in the meantime, if this is where your passion lie, there are many fine tutorials by folks more skilled in this art than I on YouTube,
All text and photos property of Fashion Doll Stylist. Copyright 2018. Please ask permission before reposting. And please credit us. Thank you!
Follow us on Twitter: @FashDollStylist
Like us on Facebook: @FashDollStylist
We're also on Pinterest: @FashDollStylist
And of course, we are on Instagram: @fashiondollstylist
.
De: Fashion Doll Stylist - https://fashiondollstylist.blogspot.com/2018/07/applied-arts-beading-basics-101.html
Fecha: July 31, 2018 at 04:01PM
.
Haz clic en la foto de abajo para ver otro de mis Blogs.
Encontraras mas publicaciones interesantes.

Visita mis Blogs: